If you’re an Android user who wishes their photos could look as polished and professional as those from an iPhone, this tutorial is just for you. In this detailed blog post, you’ll learn how to edit your Android photos to give them the classic iPhone-style aesthetic—bright, crisp, and high-resolution—with the help of free apps and some smart editing techniques.
Whether you don’t own an iPhone or simply want that premium photo look on your current Android device, read on. By the end of this post, you’ll know how to completely transform your photos with ease.
📱 Why Edit Photos Like an iPhone?
iPhones are well known for their powerful photo processing and color rendering. But did you know that with the right tools, you can achieve nearly the same quality using an Android phone? Here’s what you’ll get with iPhone-style editing:
-
Smooth skin tones
-
Balanced highlights and shadows
-
Vibrant but natural-looking colors
-
A cinematic feel for both photos and videos
🛠 Tools You’ll Need
To get started, you’ll need an app called Jio 4G Voice or MyJio App, which now includes new photo and video editing capabilities. If you already have the app installed, make sure it’s updated to the latest version via the Google Play Store.
Other useful apps for iPhone-style editing:
🧑🎨 Editing Photos: Step-by-Step iPhone Style
Here’s how to transform your Android photos step-by-step:
Step 1: Open the App and Import Your Photo
-
Launch the Jio 4G (or selected) editing app.
-
Choose the photo you want to edit.
Step 2: Apply Filters or Presets
-
Use light presets for skin smoothness and soft background blur.
-
Adjust the white balance to make skin tones look natural.
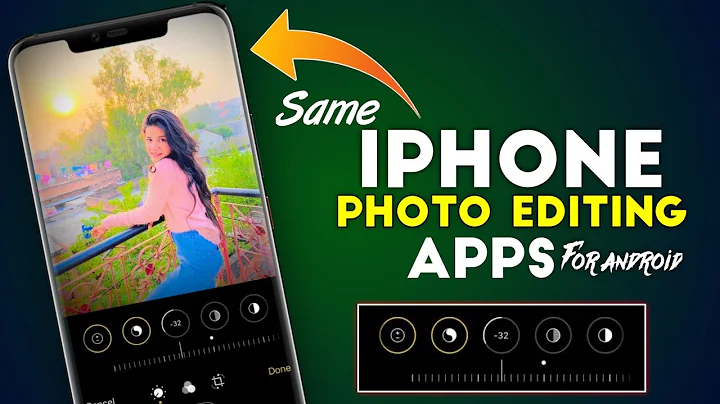
Step 3: Adjust Key Settings
-
Brightness: Increase to make the image pop.
-
Contrast: Slightly increase for depth.
-
Highlights: Reduce to bring back detail in bright areas.
-
Shadows: Slightly lift for detail in dark areas.
-
Whites: Reduce to avoid overexposure.
-
Blacks: Lower slightly for a rich tone.
Pro Tip: Avoid over-editing. Subtle adjustments bring out the best results, just like iPhone’s Smart HDR.
Step 4: Enhance Details
-
Use the Structure or Clarity tool sparingly.
-
Increase Sharpening slightly for crisp results.
-
Apply Skin Smoothing if the app supports it.
Step 5: Final Touches
-
Crop or rotate if needed.
-
Apply a soft vignette to focus on the subject.
-
Add a touch of warmth to replicate iPhone’s color science.
📸 Before and After
After editing, you’ll notice:
-
Brighter, more lifelike colors
-
Smooth skin textures
-
Balanced lighting, just like iPhone portrait shots
-
Professional-grade finish without any need for expensive gear
🎥 Bonus: iPhone-Style Video Editing
If you also want to edit your Android videos like iPhone recordings, here are a few resources:
-
CapCut Video Editor – Great for adding cinematic slow motion and filters.
-
VN Video Editor – Offers high-resolution exports and easy-to-use timeline.
-
Kinemaster – Perfect for mobile color grading and transitions.
You can check out this YouTube video tutorial for a step-by-step breakdown on both video and photo enhancements.
📤 Saving and Sharing Your Work
Once your edits are complete:
-
Save the photo in high resolution (4K if available).
-
Avoid compression—select original size when exporting.
-
Share your photos directly to Instagram, WhatsApp, or set them as wallpapers.
💡 Final Thoughts
Editing Android photos to look like iPhone captures is easier than ever. With just a few tools and the right adjustments, you can achieve stunning, professional-quality visuals. Whether you’re a content creator or just someone who loves taking great photos, these techniques will elevate your photography game.