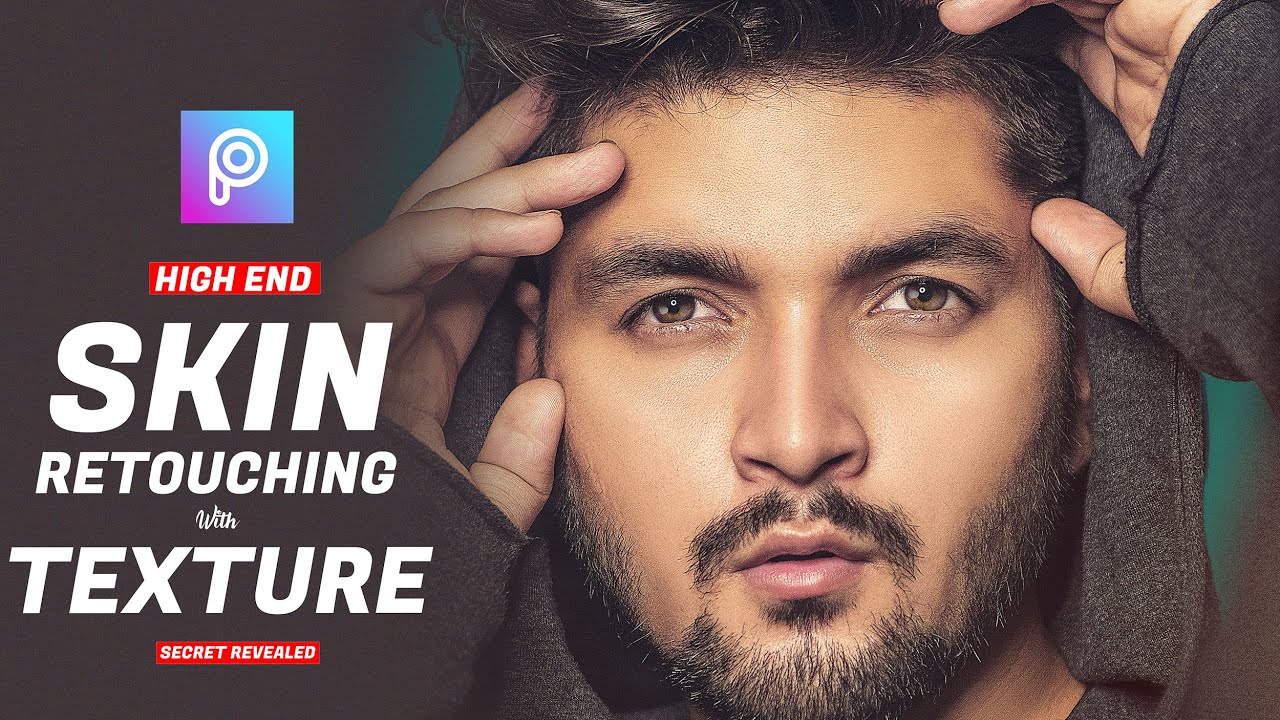
If you’ve been eagerly waiting to learn how to smooth your skin in photos—without losing texture or quality—this video tutorial is just for you. Today, we’ll walk you through a skin retouching technique that doesn’t require any paid software or Photoshop skills. Yes, this entire method can be done right from your phone!
Let’s dive into this powerful mobile skin editing technique that makes your photos look naturally smooth and professional.
📸 Why Texture-Preserving Skin Retouching Matters
Often, over-smoothing your skin using regular beauty filters or apps can make your face look fake or plasticky. This method keeps your skin texture intact while reducing pimples, blemishes, and other imperfections. Think of it as frequency separation, but simplified for mobile.
✅ Pro Tip: Frequency Separation divides your image into texture and color layers so you can work on each individually—this is the secret behind natural-looking edits!
🛠️ Tools You’ll Need
To follow this tutorial, you’ll need a mobile editing app like:
These apps are all either free or freemium and work great for this workflow.
✨ Step-by-Step Skin Retouching Without Losing Texture
1. Start with a Raw Photo
Choose a photo where the skin has visible texture—perhaps with pimples or uneven tone.
2. Remove Blemishes First
Use the “Healing” or “Retouch” tool to remove large pimples. Just tap on them lightly and clone them out.
In Snapseed, use Tools > Healing and gently brush over the spots.
3. Apply Frequency-Like Smoothing
Now use a feature that separates texture from tone. Some apps like Snapseed allow you to adjust Structure and Skin Tone separately.
-
In Lightroom Mobile, lower the Texture and Clarity sliders.
-
In FaceTune2 or AirBrush, use Smooth > Light Smooth and avoid overdoing it.
4. Add Texture Back (Optional)
If your image looks too flat after smoothing, you can reintroduce texture:
-
Overlay a texture image in an app like PicsArt or Snapseed
-
Set blend mode to Overlay or Soft Light
-
Adjust opacity for a natural finish
Free texture overlays are available here:
🎨 Bonus: Face Sculpting and Eye Enhancement
If you want to go a step further:
-
Use the Reshape tool (e.g., in AirBrush or FaceTune2) to slightly slim down the jaw or nose.
-
Use Enhance > Eyes to brighten and sharpen your eyes.
-
You can even add digital makeup using YouCam Makeup
📱 Final Touch: Color Grading and Export
Once the retouching is done, move to color correction:
-
Apply filters or custom presets in Lightroom Mobile
-
Use Tone Curve, Shadows, and HSL sliders to match the mood
-
Export in high resolution for Instagram or portfolio use
Need free presets? Grab them here:
🧠 Final Thoughts
This method works amazingly well for portraits and selfies. Your skin will look naturally flawless—not artificial. And the best part? You don’t lose any detail, thanks to the preserved texture layer.