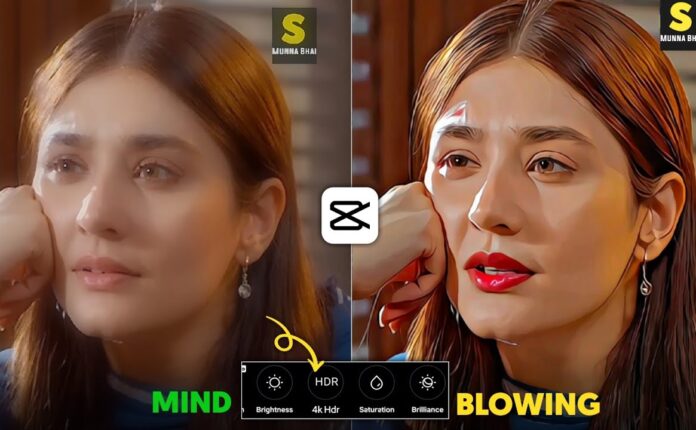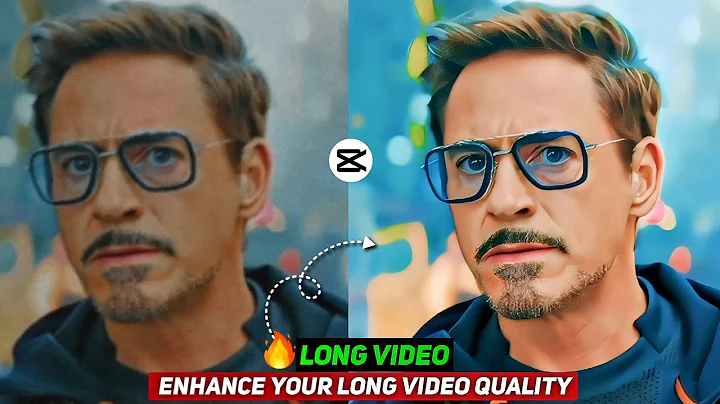
Today, I’m going to show you a super easy way to convert your normal or low-quality video into a crisp 4K HD video using just your mobile phone and the CapCut app. Whether your footage is unsaturated, low resolution, or just looks a bit dull, this method will make your video look bright, colorful, and high-definition.
Let’s get started with this easy video editing tutorial!
🧰 What You’ll Need:
-
A smartphone (Android or iOS)
-
Your original video footage
🎬 Step 1: Start a New Project in CapCut
-
Open the CapCut app on your mobile device.
-
Tap on “New Project”.
-
Select the video clip you want to convert and tap on “Add”.
🎥 Tip: Choose a video with good lighting for best results, even if it’s low quality.
🎨 Step 2: Basic Adjustments to Boost Saturation
-
Select the video layer and go to Adjustment options.
-
Increase the Saturation to make colors pop.
🎶 You’ll already see a difference here. Saturation helps in making your video feel vibrant and alive.
📈 Step 3: Adjust the Graphs
-
Tap on the Graphs option under Adjustments.
-
Invert all the values to add depth and contrast to your video.
This step helps in enhancing dynamic range—like an HDR effect—and makes your video look more cinematic.
✨ Step 4: Add Blur Effect for Soft Focus
-
Tap on Effects.
-
Go to Video Effects, then choose Lens > Blur.
-
Select the Blur effect and confirm by tapping the checkmark (✔️).
-
Expand the blur effect from both sides so it covers the full video.
📝 Note: Blur adds smoothness and reduces video noise, giving your footage a professional touch.
📤 Step 5: Export Your First Version
Now, we’ll export the partially edited video:
-
Tap on the Export icon.
-
Select 1080p resolution and 30fps (frames per second).
-
Save the video.
Don’t worry, we’re not done yet. The magic happens in the next steps!
🔄 Step 6: Reimport the Exported Video
-
Go back to the CapCut home screen.
-
Start a New Project and import the previously exported video.
-
Tap on the video, go to Adjustments, and tweak the Saturation and Sharpness again.
🧠 Pro Tip: Each video is different, so fine-tune the settings based on how your footage looks.
🌈 Step 7: Use HSL for Color Balancing
-
Tap on HSL (Hue, Saturation, Lightness) and adjust the sliders.
-
This step lets you balance specific colors like skin tones, skies, or clothing.
This is where you really control the color mood and feel of your video.
🌤️ Step 8: Adjust Highlights and Shadows
-
Modify the Highlights to control brightness in lighter areas.
-
Tweak the Shadows to reveal details in the darker parts.
Proper lighting balance makes your video look more realistic and visually appealing.
💾 Step 9: Save the Final Adjustments
Tap on the Save icon once all adjustments are done. This version of your video is almost ready—but now we add overlays for that final cinematic polish.
🔁 Step 10: Use Overlay for Enhanced Layering
-
Go back to your CapCut project and tap Overlay.
-
Import the inverted video you saved earlier.
-
Fit the overlay to the frame to match your base video exactly.
-
Tap Blend > Overlay, and adjust Opacity to your preference.
✨ This blending technique enhances texture and depth, making it look ultra-HD.
🧱 Step 11: Add a Stock Blank Video for Brightness Boost
-
Tap Overlay again.
-
Go to Stock Videos, select a blank white video, and import it.
-
Stretch the blank video to fit your entire timeline.
-
Set Blend Mode to Overlay, and reduce Opacity to subtly brighten the entire video.
This is an optional but powerful step for achieving a sharper and more vibrant video output.
🧪 Final Tweaks
Still not satisfied? You can go back and:
-
Increase Sharpness a little more
-
Adjust Saturation one last time
-
Recheck your HSL and Graph settings
🎯 Everyone’s footage is different, so don’t be afraid to experiment!
📤 Final Export – Your 4K HD Video is Ready!
Once you’re happy with the final look:
-
Tap on Export.
-
Choose 1080p at 30fps or higher if your device supports it.
-
Save and share your video.
💡 Final Thoughts and Tips
Congratulations! 🎉 You’ve just learned how to transform an ordinary video into a high-definition 4K-style clip using CapCut. This process is ideal for:
-
YouTube content creators
-
Instagram reels and TikTok videos
-
Short films or personal vlogs
🎁 Bonus Tip: If you’re looking for additional tools to upscale video quality or convert to actual 4K, consider:
And for best results, always shoot with good lighting and stable hands (or a tripod) to reduce the need for excessive edits.
📲 Download CapCut
-
Android: CapCut on Google Play
-
iOS: CapCut on App Store